
The first thing to do was to take a picture inside the Library. I chose a location that caught the full rays of the rising sun with the idea of simulating sun beams shining through water. I took the picture from a high perspective to simulate the illusion of 'floating'.

Open up Photoshop CS5.5 and create a New Image by going to [File >New...] or by hitting Ctrl+N and set the presset to Web. All the screensavers in the library are a standard screen size, so set the size to 1024x768.

After I imported my photo into Photoshop CS5.5 [File >Place], I studied the perspective of the ceiling for a moment before searching in google images for a picture of water that had some ripples and caustiscs in it.
Caustics (optics): The envelope of light rays reflected or refracted by a curved surface or object, or the projection of that envelope of rays on another surface. ~Wikipedia
After some seaching I found a picture of a shoreline in Croatia that worked pretty good. You can find the image here: click here.
Copy the image into your project and name your layer 'ceiling caustics.' Use the Free Transfom tool [Edit >Free Transform (Ctrl+T)] to resize the image, flip it upside down (holding shift helps, hit Enter to accept the transformation), and then use the Rectangular Marquee Tool (M) to erase the shoreline in the background. (just make your selection and hit delete)

Next use the Free Transfom tool again, and position the image to cover the ceiling, we're trying to create the illusion that this is surface of the water in the Library. Hold Ctrl and click on the corners of your transformation to drag them and try to line them up with the edges of the ceiling, hit Enter to accept the transformation.

The next step is to mask out the sections of the ceiling caustics layer to refine the effect a water surface. There are many meathods of doing this, View my Masking Techniques tutorial to learn how to make a mask. The idea is to pick a height where you're going to place the surface of the water, you want everything that is below that hieght to look like it is underwater, and everything above to look like it is out of the water. The image below is the mask I made, you can see I payed special attention to the small things like the blue cone and the exit sign hagning from the ceiling, as well as being mindfull of the pillars and how the water might act around them.

This is what it looks like after you apply your mask, you can see how the water fits right up into the image now.

Play with the Opacity on your image [Window >Layers - top right of Layers tab] as well as the Colour Balance and Hue/Saturation [Image >Adjustments >HueSaturation ...Colour Balance (Ctrl+U, Ctrl+B)] to get the disired transparency and colour, and then use the Dodge & Burn Tools ('O' on the keyboard to select it, but you have to click and hold on the icon in your tool box to switch between the two tools) to darken and lighten areas of the water to match the lighing of the room.

Next we want to put caustics on virtually every surface that is being lit, we're trying to get the same look as the bottom of an outdoor swimming pool with all the light ripples (caustics) dancing around on the bottom. This step requires an understanding of perspective, because you're going to have to transform at least a half a dozen seperate layers in order to cover all your major surfaces. Use the Caustics Texture layer from the Masking Techniques tutorial and the Free Transform tool to apply caustics to as many surfaces as you feel looks good, pay attention to light intensity in the image as well as scale, obviously the caustics should look bigger near, and smaller far, and don't forget to adjust opacity, and name your layers respectively. (floor caustics, table caustics, wall caustics, etc...)

Below is the result of our next step, which is to add some volume to our image, this is what really gives us the underwater feel, and it's done using a lot of cloud layers, gradients, blurring, blending, and more masking.

Lets start by overlaying a gradient. light doesn't travel through water as well as is does through air, so water get dark pretty quick as you go deeper. I created this illusion by first making a reflected gradient with the Gradient tool ('G' if you get the paintbucket by hitting 'G' on the keyboard then you need to click and hold on the tool to switch it.) Once you have the gradient tool selected, use the options up at the top to select "Foreground to Transparent" and "Reflected Gradient" (mouseover to see what they are) and make sure the colour you have selected is black. Make your reflected gradient at your horizon line and set your opacity to about 80% and your blending mode to 'Overlay' or 'Soft Light' whichever you think looks better. Use a soft black paintbrush to add some shadows underneath and behind tables, and wherever else you think it might need it. Below you can see the gradient layer I made, it doesn't have to be fancy, you can see where I sloppily added some brush strokes to darken up underneath the tables, I made a quick mask to hide the part of the gradient where the windows were, but you could also just use the eraser tool to erase that area.

This is what the gradient layer looks like over our image with the blending mode set to 'Overlay.'

The next step is probably the hardest step because it involves some pretty good observational skills and an understanding of light, we're going to make lightbeams in the image that look like light shining through murky water. Before you do this you're going to have to try and figure out where the light from each window is shinning accross the room. I started with the window that was shinning on the recycling bin. I used the Pen Tool (P) to draw a selection of where I thought the light was coming from and where it passed though the room. You can see in the image below that I selected around the first island of desks, and around the table because you can see that the light is on the floor behind the first table. You can also tell from the shadow that the blinds are partly closed, so the beam is going to be entering the room from below the blinds, I used the shadow on the wall to guesstimate how far down the blinds were.
If you wanted to be extra diligent, you could make these kinds of notes about where the light is coming in and where it is shining at the same time you take your picture, then you don't have to worry about trying to figure it out later.

After you have your selection you need to fill it. Create a new layer, name it 'beam of light' and then with your new layer selected go to: [Filter >Render >Clouds] and adjust your opacity to make it transparent. Clouds render randomly, so depending on how they render out you may want to blur them a bit or use some other tools to modify them.

Repeat the process from the previous step to create light beams for a couple of the windows, for the near window we're going to do something a bit different. Create a new cloud layer and name it 'big light beam' then go to [Filter >Blur >Radial Blur...] You want to set your blur amout to 100, your blur method to zoom, the quality to best, and move the centre of the zoom up to where the top of the window is going to be, then click ok.

Adjust the opacity down to around 40% and mask out the top portion of the blur so that the beam looks like it's coming through the window and down. Depending on how your cloud blurred, you may want to erase or paint in some areas to make it look better. Feel free to experiment with other textures or hand-drawn light beams to add to the 'water environment' feel. In the image below I overlayed another gradient layer to create a kind of haze.
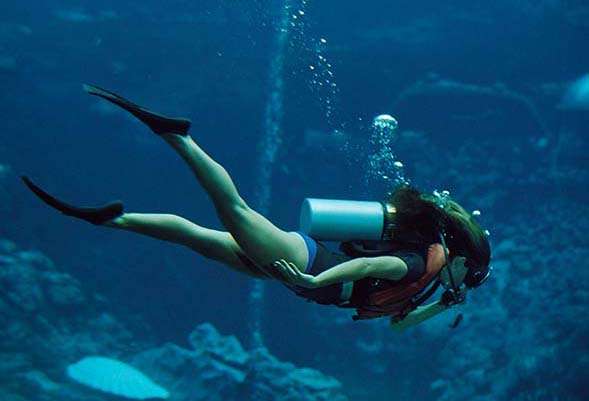
Now it's time to start floating some things in the Library to really solidify the effect of it being full of water. You hardly notice it at all in the final image, but I actually put a scuba diver in the background that I masked out of an image that I found here: click here.

We're going to fly through the next few steps, we're going to put some more floating elements into the picture. This is where you can have some fun with your friends, you can take pictures of them pretending that they're swimming under water and put them in the picture, or you can use the images that I used that you learned to make masks for in the Masking Techniques tutorial. Place Marcel, the Puffer fish, and the bottle into the project in it's own layer, and name each layer respectively. Obviously these images don't look like they fit into the composition, the bottle especially, so use the dodge and burn tools to dodge the side of Marcels face that is towards the image, as well as the puffer fish and the bottle, and burn the other side to make it look like it's in shadow.

In the image below I duplicated the bottle layer 4 times and set the blending mode of the bottom three layers to 'Multiply' then I used the Dodge & Burn tools on the multiply layers to darken up the parts of the bottle that are in front of shadowy parts of the background image. On the 4th layer I left the blending mode set to 'Normal' and used the Dodge & Burn tools to dadge the side of the bottle that is towards the window, and burn the side of the bottle facing Marcel. To finish the 4th layer off I painted transparency onto the layer mask using the paintbrush. Use a soft brush and adjust the opacity and flow of the brush so that you can mask out the parts of the 4th layer that just don't look right, and let the multiplied layers show through. When you think you're done, add another Caustics layer over the bottle and mask it so that it looks like there are some caustics hitting it.

To make Marcel look like he's more in the water we're going to add some bubbles. Use the bubbles from the Masking Techniques tutorial. Put the bubbles into a new layer and use the Free Transform tool to rotate and scale them to fit behind Marcel. Next use the Warp tool[Edit >Transform >Warp] and warp the bubbles layer to give it some perspective and create the illusion of marcel moving through the water. Use the same technique to put trails of bubbles behind his hands too. Use masks or the eraser tool with a soft brush to shape the bubbles, and blend them into the image.

Put some finishing touches on Marcel by layering some caustics over him and blurring his feet and his left hand. One way to do this is to duplicate his layer (right click on his layer in the Layers tab and click on 'Duplicate Layer') put a Gaussian blur on the bottom Marcel layer [Filter >Blur >Gaussian Blur...] and then apply a mask to the top Marcel layer and start to paint away his hand and feet.

To get a sense of how much work has gone into this image so far, this is what it looks like with our photo of the Library turned off. Everything else is layers that have been layed over top of the Photo layer, cut, cropped, masked, coloured and blended. You can really see in this image how much time went into masking out all the furnature in the photo as it looks like it's still there.

All though our image already looks pretty good, there is still a tonne of work that we can do with blend layers to make the image pop just a little bit more. Below is a list of 10 more layers that I have layed overtop of everything we've done so far. The order of the layers is important, #1 is on the very top and everything else is stacked in order beneath it.
1. Gradient Map, Black-White, Luminosity, 54%
2. Fill Layer, #657dc3, Color Dodge, 2%
3. Photo Filter, Warming Filter (85)
4. Fill Layer, #000223, Exclusion, 18%
5. Adjustment Layer, Levels, 12-1.10-255
6. Adjustment Layer, Hue/Saturation, Saturation: -23
7. Fill Layer, #657dc3, Soft Light, 25%
8. Reflected Gradient (Tor third, just over Marcels Head) #517172, Overlay, 51%
9. Gradient, White-Transparent (left to right, white up to about the middle of the image), Overlay, 77%
10. Fill Layer, Solid black, Overlay, 46%
Every layer does something different, it may not look like each layer is doing anything really noticable, but when you get them all stacked together in the right order they really add up to improve the look of the image.

One last finishing touch, I took the Polygonal Lasso Tool and hand drew some more light beams hitting the bottle and going around it.

I filled my selection with white, then I put a direction blur on it, made it a bit transparent, then changed the blending mode to Soft Light.
Here it is on a Black backdrop so you can see it.

And here it is on the final Image.
That's it for the Photo editing, the rest of this screensaver image was finished in Adobe Illustrator 5.5